One tool that we’re going to go over is the ‘Quick Selection Tool.’ The ‘Quick Selection Tool’ is a basic background removal tool and it’s great for beginners. Let us show you how it works in five quick and easy steps.
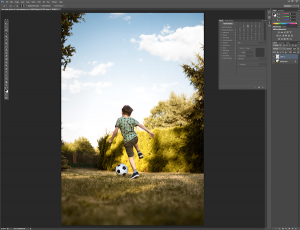
Step 1: Open Your Image
Choose the image that you want to remove the background from and open it in Photoshop.

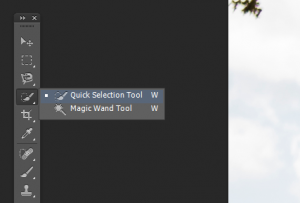
Step 2: Select the ‘Quick Selection Tool’
Select the ‘Quick Selection Tool’ in the tools panel. If you don’t see it, it could be nested in the ‘Magic Want Tool.’

Step 3: Begin Your Selection to Remove the Background
Bring your ‘Quick Selection Tool’ over to the subject and begin the selection process. As you start your selection, marching ants will appear. Work your way around your subject until you have selected everything you want.

You might make mistakes during the process and select areas you don’t want to include. If that happens hold the ‘Alt’ (PC) or ‘Option’ key (Mac) to toggle the subtraction mode for the tool and you can start erasing from your selection.
Once you’re happy with your selection, you’re ready to move on.

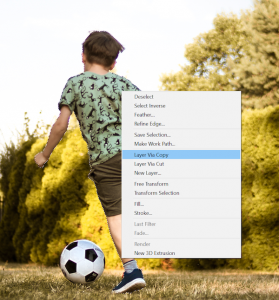
Step 4: Place your Selection in a New Layer
The next step is to view your selection in a new layer. Right click on your selection and click ‘Layer Via Copy.’

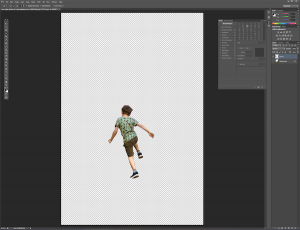
Step 5: View Your Subject in a New Layer
Your subject will now be in a new layer with a transparent background without editing the original photo. Toggle off the visibility of your original photo to view your image with the removed background.

Now that your subject is free from its background, you can place anything behind it. Use your wildest imagination!
This tutorial of the ‘Quick Selection Tool’ is a quick and easy way to remove the background from an image in Photoshop. If you need more advanced features and tools for your products, Digital Impact & has the resources to create professional designs. We do all our graphic design in house and are here to help find a solution to your design needs.


